The Wiki for Tale 6 is in read-only mode and is available for archival and reference purposes only. Please visit the current Tale 11 Wiki in the meantime.
If you have any issues with this Wiki, please post in #wiki-editing on Discord or contact Brad in-game.
Difference between revisions of "User:Avanya/Glassblowing guide"
| (12 intermediate revisions by the same user not shown) | |||
| Line 31: | Line 31: | ||
:[[Image:Glassblowing$heating_plane-small.jpg]] | :[[Image:Glassblowing$heating_plane-small.jpg]] | ||
*(image from tale 2 wiki, courtesy of FaceAnkh) | *(image from tale 2 wiki, courtesy of FaceAnkh) | ||
| + | |||
| + | <br>One thing to remember is that every tick of time that a section of glass is in the heating plane, it is accumulating heat. At the same time, the entire piece looses a little heat. As you move the piece around, keep in mind you are "summing up" heat from all those ticks, but also losing heat the longer it's out of the heating plane. Short of going all geeky here and talking about calculus, I like to use the analogy that its like painting with heating. As you move the piece around you add more paint to it, but as it dries, the color fades. I especially think of this analogy when I use pinpoint heat, since the "brush" of heat is so exact. Developing a method of making a piece is balancing these two actions...you want to end up with a certain profile of summed up heat across the piece before you blow, since hotter pieces blow larger than cooler ones. When you think about it that way, it's easy to see how there are many possible ways of attaining the same end result, but by using different heating settings and keystroke combinations. | ||
===Glass Controls=== | ===Glass Controls=== | ||
| Line 274: | Line 276: | ||
This was one of the toughest challenges for me to figure out. I made many hundreds of attempts to work out the sequence below, so I hope it saves other people time as they try to master this piece. (Many thanks Zaarain, his comments on the T4 wiki guide helped me get started). There are probably a few different key stroke sequences that work, but I will share the one I use. | This was one of the toughest challenges for me to figure out. I made many hundreds of attempts to work out the sequence below, so I hope it saves other people time as they try to master this piece. (Many thanks Zaarain, his comments on the T4 wiki guide helped me get started). There are probably a few different key stroke sequences that work, but I will share the one I use. | ||
| + | |||
| + | I finish my coils inside the GH, but for a better view, here is one I finished outside: | ||
| + | |||
| + | [[Image:Discoil_goal.png]] | ||
| + | The goal shape of a distillation coil | ||
| + | |||
| + | |||
| + | [[Image:Distcoil_8029.png]] | ||
| + | An 8029 quality distillation coil. | ||
| + | |||
There are a few steps to making a successful distillation coil. There is the key-stroke sequence to make the coil, the balancing of the coil while it cools, and finally finding your maximum quality spot after the timer expires. | There are a few steps to making a successful distillation coil. There is the key-stroke sequence to make the coil, the balancing of the coil while it cools, and finally finding your maximum quality spot after the timer expires. | ||
| − | 1) As far as making the coil, I leave the beginning and end of the pipe flat. I do NOT blow the bulb, and my best quality ever from this technique was 8700+, so I feel pretty happy with it. I repeat the same sequence of inserts, sags (allowing the piece to droop one tick), and rotations, with ONE exception. I leave out one insert in the middle, which helps to compress the length of the coil. You can leave this step out, and just repeat the sequence for the whole length, and you can still achieve 6k-7k qualities, but I find this extra compression really helps to boost the quality. | + | 1) As far as making the coil, I leave the beginning and end of the pipe flat. I do NOT blow the bulb, and my best quality ever from this technique was 8700+, so I feel pretty happy with it. I repeat the same sequence of inserts, sags (allowing the piece to droop one tick), and rotations, with ONE exception. I leave out one insert (A keystroke) in the middle, which helps to compress the length of the coil. You can leave this step out, and just repeat the sequence for the whole length, and you can still achieve 6k-7k qualities, but I find this extra compression really helps to boost the quality. Additionally, please note that you MUST rotate with the N key (M produces a coil that curls the wrong way), and you will NEVER blow this piece. |
'''Forming the Coil''' | '''Forming the Coil''' | ||
| Line 283: | Line 295: | ||
:(leaving the front of the coil straight): | :(leaving the front of the coil straight): | ||
| − | * | + | *AAAA (fast) |
| − | *Sag | + | *Sag four times |
*ANNN. | *ANNN. | ||
:(forming the coil) | :(forming the coil) | ||
| − | * | + | *Sag, sag, A, sag, sag, ANNN (this is the main sequence for making the coil) |
| − | + | :Do this sequence a total of 9 times to make the coil. However, on the 4th or 5th repeat, leave out the middle A, so that you do this: Sag x 4, ANNN. | |
:(leaving the bulb unblown but straight) | :(leaving the bulb unblown but straight) | ||
| − | * | + | *sag, sag. While the last 2 sags are occuring, spam A the piece all the way into the Glory hole. |
*Balance the coil. | *Balance the coil. | ||
| − | 2) Balancing is crucial to the quality | + | 2) Balancing is crucial to the quality. I find it hard to check the quality while I balance, because the quality is relative to the rotational orientation. (this is the only non-symmetrical piece, so this is the only case where we see quality change due to rotation). When I do watch quality as I balance, I have seen quality change as much as 500 or more from one sag of the piece, so balancing really makes a HUGE difference! I usually spend all the remaining "active" time (where the piece will still sag) trying to get it perfectly balanced on the central axis. Worry about the quality when its done. Also, if you try to unload the piece while you are balancing it (if you do watch quality as you work), be warned... you have to be very fast! I have often seen a sag happen just as I pull out the piece, and I end up with a much lower quality coil. It's much safer to just concentrate on balancing, and then when its cooled off, check for your quality peak. |
One trick that I use to do this that I use a line on the back of the glory hole to help me align the tops and bottoms of the coil peaks. After I make my first coil, I don't remove it right away. I spam the G button to highlight the goal animation for a while, and then align my camera so that the peaks of the coil line up w/ the lines drawn on the back of the glory hole: | One trick that I use to do this that I use a line on the back of the glory hole to help me align the tops and bottoms of the coil peaks. After I make my first coil, I don't remove it right away. I spam the G button to highlight the goal animation for a while, and then align my camera so that the peaks of the coil line up w/ the lines drawn on the back of the glory hole: | ||
| − | + | [[image:Distcoillineup_marked.png]] | |
| − | I lock my camera with | + | As you can see, the tops of the coils line up with the little straight line marking on the glory hole. Also, the bottom line of the coils is parallel, and goes through the corner of the blue panel on the back wall. |
| + | |||
| + | I lock my camera with alt-L once I have it angled just right. Then, for each coil I make, as I rotate and balance the coil, I have that line to visually help me figure out if the piece is too high or too low. | ||
3) Finally, once the timer on the glory hole has expired, you can take your time to find the peak of the quality of the piece you made. Rotate it around and hit Q for each position, until you find the peak. The big thing here is that you will want to rotate the piece fully many times, because the rotation motion doesn't sum up to 360 degrees evenly. So while you may find the peak quality at, say 7400 quality, if you rotate it all the way around again, you might find the quality has gone up to 7600! (Generally, the higher quality you have gotten, the bigger steps in these peak qualities as you rotation from peak to peak...I get excited when I see a difference of more than a few hundred, it usually cues me in that I have a great successful piece in the 8k's range). So it can take a little while rotating it around and around, but honing in on the best quality is worth it. After you're found the peak, unload it. | 3) Finally, once the timer on the glory hole has expired, you can take your time to find the peak of the quality of the piece you made. Rotate it around and hit Q for each position, until you find the peak. The big thing here is that you will want to rotate the piece fully many times, because the rotation motion doesn't sum up to 360 degrees evenly. So while you may find the peak quality at, say 7400 quality, if you rotate it all the way around again, you might find the quality has gone up to 7600! (Generally, the higher quality you have gotten, the bigger steps in these peak qualities as you rotation from peak to peak...I get excited when I see a difference of more than a few hundred, it usually cues me in that I have a great successful piece in the 8k's range). So it can take a little while rotating it around and around, but honing in on the best quality is worth it. After you're found the peak, unload it. | ||
| + | |||
| + | |||
| + | <br> | ||
| + | Watch me make a [http://youtu.be/FjWVmaTttek distillation coil] in a video here! | ||
==Hookah Bowls== | ==Hookah Bowls== | ||
Latest revision as of 21:52, 6 February 2013
Introduction
Welcome! I have spent a lot of time trying to iron out my skills in Glassblowing, and I want to share my knowledge with others that are seeking to learn the trade. I am by no means a master of this skill, and I am sure there are others that play that can make higher quality items than myself. However, the knowledge to make these products is often guarded and even lost as experienced players leave the tale. It is my intention to spread what knowledge I have to help as many in Egypt as possible!
Before reading further, I would highly recommend reading the glassblowing guides that have come before this. They have helped me greatly to get started in the trade, and my thanks go out to all that contributed to these guides!
- Tale 2 guide - great info for beginners.
- Tale 6 guide - nice thermometer guide
- Tale 3 guide - good hookah bowl guide
One final note: if you are new to glassblowing, be prepared to make a LOT of mistakes, and waste a LOT of glass. This is no sissy anvil work, where you can simply pull up your materials and try again. Every attempt will cost glass, and that cost can add up fast. I suggest going into this endeavor understanding that, so that you don't get too frustrated. Make each mistake count, and be sure to analyze where your piece went wrong whenever possible. And finally, remember, glass blowing is NOT for everyone. It's perfectly ok if it's not for you :)
The Glory Hole Basics
Lag Danger
Lag is a primary enemy of glassblowing. I try to use a glory hole in an area that is not too crowded with buildings, and always at a time when there are not many avatars moving around. Often, a friend walking by can add just the wrong lag delay to a piece, and really throw the quality off. If you have a very laggy connection to the game, you might not want to attempt some of the complicated pieces.
Timer
There is a fixed time limit to how long you have to work on a piece in the glory hole. This time begins as soon as you select your project, and the unworked glass rod/pipe animates. Therefore, have your camera set up how you want, and be ready to go before you start. Every second can count, so try to not waste any time.
Heating Settings
Selecting the proper heat setting is crucial to your work. The "style" of heating and moving will depend very much on how the heat is being applied to the pieces. Personally, I use different heat settings for different pieces, depending on the effects I want to achieve.
- Standard: applies heat at the plane, with some heat spreading on both sides. A great overall setting, when there isn't much detail heat work needed.
- Pinpoint: applies heat at ONE spot on the plane, with minimal heat spreading on either side. Wonderful when you have some areas that need a lot of heat and other areas that you need to keep the heat off of. It can take some practice to get smooth heating over sections using this setting.
- Gradual: applies heat over a large area, with a large amount of heat spreading on either side. I find this setting useful when you need smooth heating over the whole project.
- Front Heavy:
- Back Heavy:
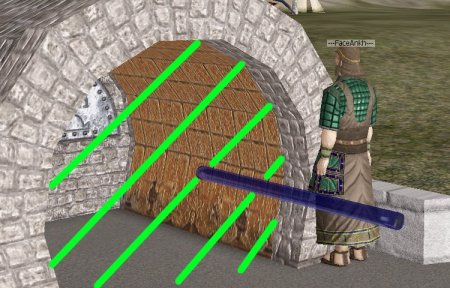
Remember that the heating plane for pinpoint and standard controls is just inside the glory hole, as illustrated here:
- (image from tale 2 wiki, courtesy of FaceAnkh)
One thing to remember is that every tick of time that a section of glass is in the heating plane, it is accumulating heat. At the same time, the entire piece looses a little heat. As you move the piece around, keep in mind you are "summing up" heat from all those ticks, but also losing heat the longer it's out of the heating plane. Short of going all geeky here and talking about calculus, I like to use the analogy that its like painting with heating. As you move the piece around you add more paint to it, but as it dries, the color fades. I especially think of this analogy when I use pinpoint heat, since the "brush" of heat is so exact. Developing a method of making a piece is balancing these two actions...you want to end up with a certain profile of summed up heat across the piece before you blow, since hotter pieces blow larger than cooler ones. When you think about it that way, it's easy to see how there are many possible ways of attaining the same end result, but by using different heating settings and keystroke combinations.
Glass Controls
It is VITAL to use hotkeys when blowing high quality products. There is simply no time to use mouse/menu commands to navigate while your piece is making. I would also consider it crucial that you memorize these commands. I spend my brain power watching the piece form, deciding/remembering what keys to hit, and balancing the piece. There is no time to check the keyboard or a command list. Fortunately, after a little practice, these keys will become second nature!
- G - Goal Display
- A - Moves the project into the glory hole
- S - Moves the project out of the glory hole
- Q - Check the current quality
- N - Rotate counterclockwise
- M - Rotate clockwise
- U - Unload (complete) the project
- D - Discard the project, destroying the materials
- B - Blow into the tube
Quality
Don't be afraid to show the goal piece as you are working. (though, for most pieces, you will want to keep rotating, and be careful if any of the glass is still in the heating plane). I usually flash the goal after I have applied the heat and moved my piece out either to the back or the front of the glory hole. As you compare your piece to the ideal piece, keep these two key ideas in mind:
- Overblown/Underblown
- Be careful to not overblow your piece! You will often find its a little smaller than the goal, and want to just eek out a bit more quality by blowing one more time. If the sizes are close, you might want to restrain yourself, or at the very least, wait until the hot parts are red or mostly cooled off, so the expansion is small. Overblown sizes reduce quality dramatically!! Of course, sometimes its worth the risk, but be warned.
- Balancing
- Try to keep your piece centered for best quality. For most pieces I make, I take time at the end trying to balance it. If your piece is off-center, when you rotate it, it will appear to circle around an inner axis (defined by the middle of the goal piece illustration). This is very important, since quality is determined by comparing your piece in space to the goal piece!! If you see your piece circling around an axis, then you'll want to balance it. This means of course, rotate until your piece is at the peak of this circling path, and let it sag down to the center axis. When you rotate and the piece doesn't move, you know its right. The more off-centered the piece is, the more of a penalty to the quality you will have, and for some pieces even the slightest offset can be devastating.
Remember that hot glass (yellow) will drop faster than cooler glass (red), and cold glass (blue) will not drop at all. Keep this key fact in mind when you are balancing!
Camera Angle
It can be tricky to get the right camera angle to help you "see" the whole project. I use different angles depending on what I am working on, but especially depending on where it ends up. (I balance distillation coils at the back of the glory hole, so for those its vital for me to have a good site to the back. Beakers I balance in front of the glory hole, so there, I need more of a front view.) I find locking the camera with alt-L very helpful, so I don't accidentally move my mouse and lose my camera position mid-piece. Also, the F12 command will remove the interface, which clears up even more space. (hitting F12 again returns the interface). The added bonus is that you won't be distracted from a flashing chat tab while in the middle of working a piece. Finally, I use camera F6, but that's just my preference. Find what is comfortable for you! And try standing in different spots around the glory hole. It is worth taking the time to get the camera just right, so you can utilize your whole screen.
The Pieces
Here are details on how I make each of the individual glassblown pieces. I will try to update any improvements I come upon, but again, remember, there are multiple ways to approach each item. These are just my own techniques. I included a "difficulty" rating, only as a loose guideline, to help people focus on pieces that may be more at their skill level. Of course, what I think is "easy" might be hard for some, and vice versa.
I wanted to include videos of making each piece, because I find that movement timing is VERY important in glassblowing, and that is very difficult to gleam from just descriptions and keystroke guides.
Finally, if you have any questions about my descriptions, please feel free to chat me in game. Happy Glassblowing!
Thermometers
- Heater Setting: Standard
- Difficulty: Easy
- Typical Qualty: 7k+
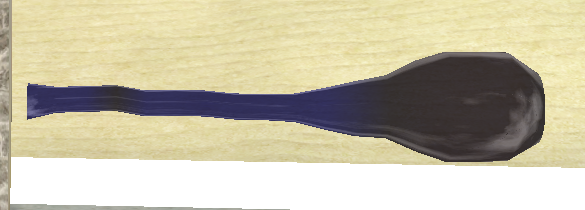
- Thermometer Goal
I find that the instructions for thermometers on the T5 wiki work very well, and yield 5k quality.
I use a slightly tweaked version of this method, to make the bulb a bit longer, which gives 7k quality.
- push rod to back of GH (hold down A)
- begin spinning (I spin ~ 4 times per second)
- pull out rod 8 spaces (S x 8, while spinning in between)
- let this spot get yellow, then push back in once (A once)
- let this spot get yellow, then blow 4 times, pausing in between blows.
check quality, and remove. (or if needed, remove from heat and balance.)
I make a thermometer in about 10 seconds. this method is very fast when you get used to it, and very reliable.
- quality 7553 thermometer
Watch me make a thermometer in a video here.
Barometric Spheres
- Heater Setting: Pinpoint
- Difficulty: Moderate
- Qualty Range: mid 6k+ to mid 7k+
I use pinpoint to try to get the peaks of the two bulbs nice. I find standard heating makes the bulb peaks too flat. However, this means I have to move the bulbs around a bit more to spread some of the heat out to the sides of the bulbs, so they don't end up too disk shaped. With careful heat spreading, I've gotten up to 8k quality, but I don't see much point in worrying about the quality past 7k. I"ll present two methods. One quicker one for getting 6k+ quality (great for tattoo), and a more detailed way to get 7k'ers.
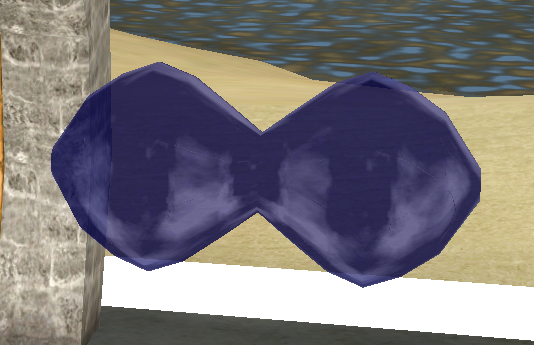
- Barometric Sphere Goal
Method 1: Quick and Dirty
- rotate constantly, a few times a second at least.
- A x 6, pausing between each for a rotation or two. the whole section should turn red.
- S once, and let turn yellow. (this is the peak of the bulb).
- B x 3, pausing between each for a rotation or two.
- A x 8, pausing between each for a rotation or two. The rest of the rod should now be red.
- S x 2, and let turn yellow (this is the peak of the second bulb).
- B x 6, pausing between each for a rotation or two. The two bulbs should be approx. the same size, or the newer one a bit smaller (but more yellow).
- S the whole rod, while rotating.
- B a few more times, checking goal and quality before and after each B. Try to NOT overblow the peaks of the bulbs.
This quick and dirty method will regularly give 6k quality bulbs, and can, with careful blowing, give 7ks. The bulbs, however, are a bit disk shaped, and do not extend out as roundly as the goal. We can apply a little more heat to the sides of the bulb peaks to correct for this, and achieve higher quality bulbs.
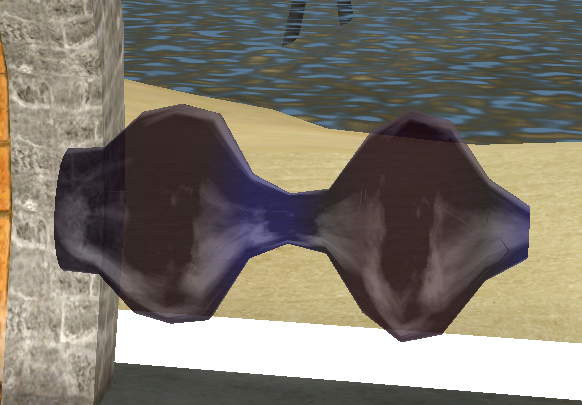
- quality 7379 barometric sphere, made with Method 1, above
Method 2: Rounder Bulbs
Once you are used to method 1, try to add a bit more heat at the spots before and after the peak. You can do this by slowing down a bit as you move through those spots, or by quickly coming back to them when you are at the peak heating again. This extra heat will help to round out the bulbs a bit, and will help raise the quality of the piece even more.
- rotate constantly, a few times a second at least.
- A x 6, pausing between each for a rotation or two. the whole section should turn red. linger on this spot just an extra rotation or two. (this is in front of the peak)
- S x 2, and linger just a rotation or two. (this is behind the peak)
- A x 1, and let this turn yellow.(this is the peak of the first bulb)
- B x 3, pausing between each for a rotation or two.
- A x 8, pausing between each for a rotation or two. The rest of the rod should now be red.
- S x 1, and linger for a rotation or two. (this is in front of the peak)
- S x 2, and linger for a rotation or two. (this is behind the peak)
- A x 1, and let turn yellow (this is the peak of the second bulb).
- B x 6, pausing between each for a rotation or two. The two bulbs should be approx. the same size, or the newer one a bit smaller (but more yellow).
- S the whole rod, while rotating.
- B a few more times, checking goal and quality before and after each B. Try to NOT overblow the peaks of the bulbs.
Watch me make a barometric sphere in a video here!
Beakers
- Heater Setting: Gradual
- Difficulty: Easy - Moderate
- Qualty Range: 8.5k - 9.5k
You want to heat the entire pipe as evenly as possible. It will also take a lot of blowing to get the size up, and since the piece cools as it is enlarged, we will do a little blowing while we heat it. Otherwise, it can run out of heat before the size is right, and reheating it is tricky. Keep a good rhythm while moving it in and out of the glory hole to help keep the heating even. Don't worry about the slight lip on the beaker at all.
- Beaker Goal
- A, rotate 1 second, A, rotate 1 second, A.... until the piece is all the way in the glory hole. it should have all turned yellow. (for me its A NNNN A NNNN, as I rotate about 4 times a second).
- S, rotate a few times, S, rotate a few times S, ... until the piece is all the way out of the glory hole. Can do this a little faster than the previous step, but just be consistent with the whole length of the pipe. (this time its S NNN S NNN S NNN).
- A, rotate a few times, A, rotate a few times A, ... until the piece is all the way in the glory hole. We are trying to keep the whole thing heated yellow. (again for me its A NNN A NNN )
- B x 4 (with one spin in between) fast. The outer bit of the beaker will be a bit larger, but it will even out in the end.*
- S all the way out, slowly this time, making sure everything is yellow, and not sagging. (for me, S NNNN S NNNN S NNNN)
- B to goal: Specifically, I spam B fast with one rotation in between until the size is close to the goal, or around 6-7k.
- After that, I check the centering of the piece, and do any adjustments needed. Then I carefully do the final blows, checking the goal in between each.
- To help prevent overblowing it, save your last few blows for when the piece has cooled a bit, so the size increases are small.
- *(On the last heating pass out of the glory hole, the outer edge cools just a bit faster than the inner sections. This cooling compensates for that front part being a bit larger from the first four blows)
- quality 9419 beaker
Watch me make a beaker in a video here!
Test Tubes
- Heater Setting: standard
- Difficulty: moderate
- Quality Range: 7.5k to 8.5k
I use standard heat because I find gradual heating does not allow for making a well defined lip at the end of the test tube. Also, the piece could not be balanced at the back of the glory hole, because some of it would still be in the heating zone on gradual heating. Thus, even though gradual heating would at first glance be preferred since it heats pieces much more evenly, I use standard heating, for more control.
This piece is made in a similar fashion to the beaker. The new complexities are that its harder to obtain a smooth heat with standard heating, and that we need to make a lip on the end of the test tube. Be careful to NOT overblow the size of the tube, and make sure to balance it well.
Because we are adding a more concentrated heat to each segment, the hot parts tend to drop faster. Its vital to keep the pipe as straight as possible while heating it. This means ROTATE a LOT, and very fast, to keep sags evened out as best you can.
- Test tube Goal
- A slowly, while rotating fast, heating the entire pipe.
- S slowly, while rotating fast, heating the entire pipe to yellow.
- A more quickly, while rotating fast, heating the entire pipe to a consistent yellow. (The far back of the pipe will lose a bit of heat by the time the whole pipe is pushed in).
- blow 1 time, pause a few seconds, then blow again.
- S three times, allowing the end section of the pipe to heat back to yellow.
- A until the piece is again at the back of the glory hole and out of the heating plane.
- check the goal size, and blow carefully (1 to 2 blows is usually enough). You do not want to overblow the body of the tube!! You also want to center the test tube on the central axis. One tick of sag can change the quality by 300-400 or more. You'll need to keep spinning very fast while you balance it.
- Quality 8556 Test Tube
Watch me make a test tube in a video here!
Thistle Tubes
- Heater Setting: Pinpoint
- Difficulty: moderate - hard
- Quality Range: 7.5k - 8.5k
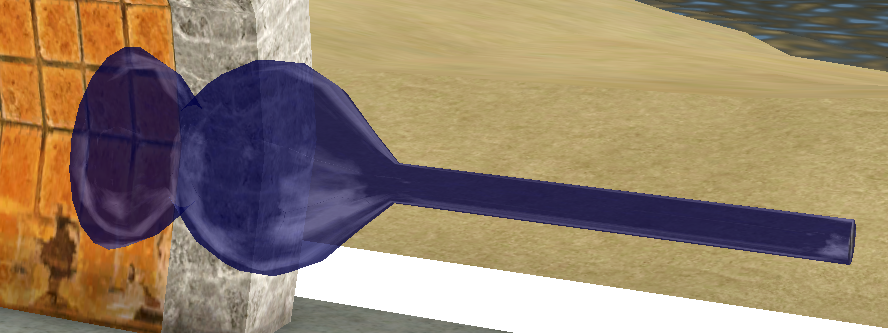
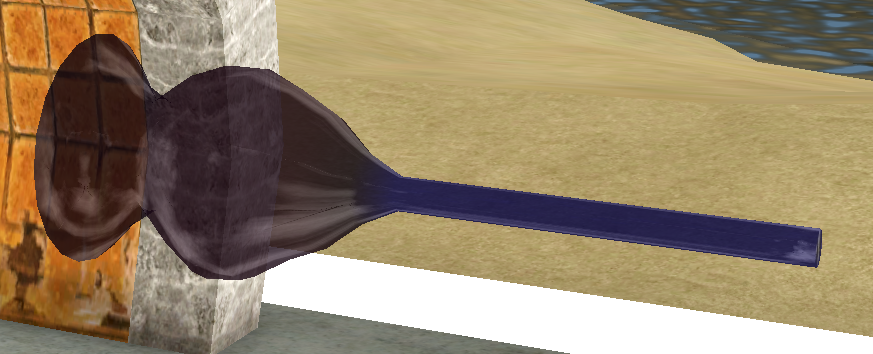
Thistle tubes build off your skills from making barometric spheres. That is, learning to "paint" on heat with pinpoint setting to achieve a nice round bulb. The trick is to get the funnel part the same size as the bulb. If either is too big, your quality suffers from overblowing. Generally, if I have to pick, I try to get the bulb size accurate.
I position myself with a nice outside view of the gh, as I finish the piece outside.
- Thistle Tube Goal
- Spin at a fairly rapid pace the entire time, for a nice symmetrical piece.
- A once.
- Blow twice. This will be a small change.
- A once.
- Blow three times, pausing slightly between each. This "cone" part should be nice and yellow.
- A seven times, pausing about one second between each. This entire section should be red.
- S 4 times, slowly, letting these parts get some yellow color.
- A once.
- Blow 3-4 times, but do not allow the bulb size to exceed the size of the cone.
- S fast, to get the entire piece out in front.
- Blow to goal, and balance.
How hot you allow your cone to get, and how fast you make your bulb may require a different number of blows to get them to the same size. These steps work well with my own timing of making the piece, but that is something that is very individual, so feel free to vary to fit your own style.
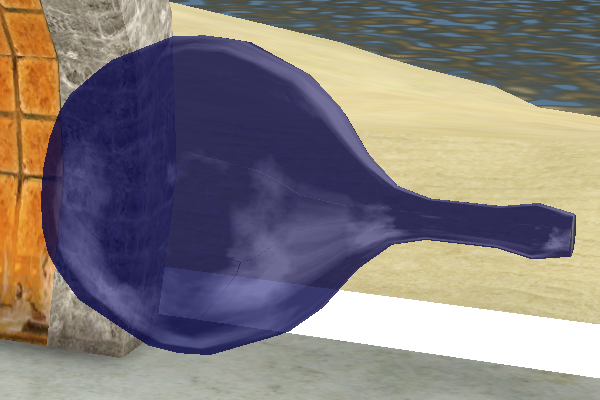
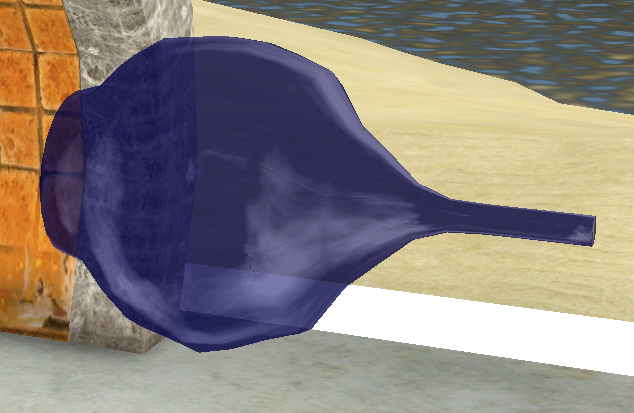
- Quality 8382 thistle tube
Florence Flasks
- Heater Setting: Gradual
- Difficulty: Moderate - Hard
- Quality Range: 7k - 8k
Florence flasks are the chemistry piece that I struggle the most with. Getting a nice smooth round bulb that's not too flat in the middle takes a lot of practice, and I think, luck. Even though it means less accuracy in heating, I find that the gradual heating works best to give a smooth heating profile for a round bulb. I also usually ignore the slightly blown stem. If you know you only want one or two more blows to the bulb to get to the desired goal size, then you can work the stem at the end of the process, but it's possible to get great results without doing so (sometimes doing that can improve an otherwise mediocre piece).
- Florence Flask Goal
- A 11 times, fast. If you are fast, you can spin once in between each push, but the important thing is to get the glass in place as quickly as possible.
- As soon as you see some yellow, blow 3 times. (fast blows, this creates a sharpish peak in the center, which prevents the middle of the bulb from going too flat).
- pause a few seconds and blow 1-2 times more.
- A x 3, spinning once in between each. then S the piece all the way out, spinning once in between. This adds a little more heat around the center, to help the piece get round and not be too disk shaped.
- Blow to goal, spinning once in between each blow at least. You may want to check the goal carefully as you size it.
- Balance as needed.
Optional
You can try to blow the stem out a little. This works well when the piece is at 6000-6500 quality, and there doesn't seem to me more than 1 or 2 blows of size increases left before the bulb will exceed the goal.
- follow the above steps, and blow the bulb almost to the finished size.
- Hold A down until the piece is all the way into the GH, and immediately begin spinning.
- Hold S down until the piece is all the way out of the GH, and immediately begin spinning. (This should turn the entire piece red)
- Blow 1-2 times, and be careful to not overblow. You may need to rotate and let it cool slightly before blowing.
- Quality 7788 florence Flask, made without the optional instructions above.
Watch me make a florence flask in a video here!
Distillation Coils
- Heater Setting: Pinpoint
- Difficulty: Hard
- Quality Range: mid 7k - mid 8ks
This was one of the toughest challenges for me to figure out. I made many hundreds of attempts to work out the sequence below, so I hope it saves other people time as they try to master this piece. (Many thanks Zaarain, his comments on the T4 wiki guide helped me get started). There are probably a few different key stroke sequences that work, but I will share the one I use.
I finish my coils inside the GH, but for a better view, here is one I finished outside:
 The goal shape of a distillation coil
 An 8029 quality distillation coil.
There are a few steps to making a successful distillation coil. There is the key-stroke sequence to make the coil, the balancing of the coil while it cools, and finally finding your maximum quality spot after the timer expires.
1) As far as making the coil, I leave the beginning and end of the pipe flat. I do NOT blow the bulb, and my best quality ever from this technique was 8700+, so I feel pretty happy with it. I repeat the same sequence of inserts, sags (allowing the piece to droop one tick), and rotations, with ONE exception. I leave out one insert (A keystroke) in the middle, which helps to compress the length of the coil. You can leave this step out, and just repeat the sequence for the whole length, and you can still achieve 6k-7k qualities, but I find this extra compression really helps to boost the quality. Additionally, please note that you MUST rotate with the N key (M produces a coil that curls the wrong way), and you will NEVER blow this piece.
Forming the Coil All the actions should happen fast, and in between "ticks" or sags of the piece. Specifically, the "ANNN" is very fast, and all 4 keystrokes happen in between sags.
- (leaving the front of the coil straight):
- AAAA (fast)
- Sag four times
- ANNN.
- (forming the coil)
- Sag, sag, A, sag, sag, ANNN (this is the main sequence for making the coil)
- Do this sequence a total of 9 times to make the coil. However, on the 4th or 5th repeat, leave out the middle A, so that you do this: Sag x 4, ANNN.
- (leaving the bulb unblown but straight)
- sag, sag. While the last 2 sags are occuring, spam A the piece all the way into the Glory hole.
- Balance the coil.
2) Balancing is crucial to the quality. I find it hard to check the quality while I balance, because the quality is relative to the rotational orientation. (this is the only non-symmetrical piece, so this is the only case where we see quality change due to rotation). When I do watch quality as I balance, I have seen quality change as much as 500 or more from one sag of the piece, so balancing really makes a HUGE difference! I usually spend all the remaining "active" time (where the piece will still sag) trying to get it perfectly balanced on the central axis. Worry about the quality when its done. Also, if you try to unload the piece while you are balancing it (if you do watch quality as you work), be warned... you have to be very fast! I have often seen a sag happen just as I pull out the piece, and I end up with a much lower quality coil. It's much safer to just concentrate on balancing, and then when its cooled off, check for your quality peak.
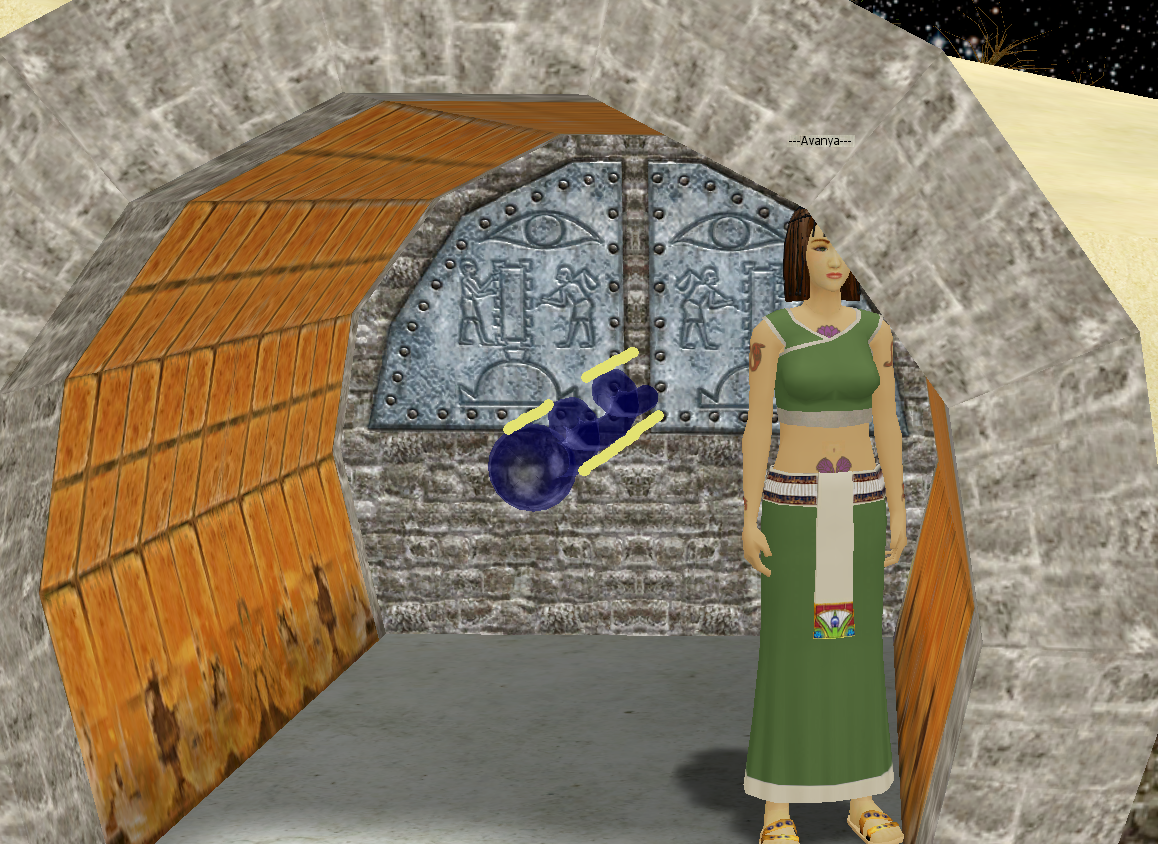
One trick that I use to do this that I use a line on the back of the glory hole to help me align the tops and bottoms of the coil peaks. After I make my first coil, I don't remove it right away. I spam the G button to highlight the goal animation for a while, and then align my camera so that the peaks of the coil line up w/ the lines drawn on the back of the glory hole:
As you can see, the tops of the coils line up with the little straight line marking on the glory hole. Also, the bottom line of the coils is parallel, and goes through the corner of the blue panel on the back wall.
I lock my camera with alt-L once I have it angled just right. Then, for each coil I make, as I rotate and balance the coil, I have that line to visually help me figure out if the piece is too high or too low.
3) Finally, once the timer on the glory hole has expired, you can take your time to find the peak of the quality of the piece you made. Rotate it around and hit Q for each position, until you find the peak. The big thing here is that you will want to rotate the piece fully many times, because the rotation motion doesn't sum up to 360 degrees evenly. So while you may find the peak quality at, say 7400 quality, if you rotate it all the way around again, you might find the quality has gone up to 7600! (Generally, the higher quality you have gotten, the bigger steps in these peak qualities as you rotation from peak to peak...I get excited when I see a difference of more than a few hundred, it usually cues me in that I have a great successful piece in the 8k's range). So it can take a little while rotating it around and around, but honing in on the best quality is worth it. After you're found the peak, unload it.
Watch me make a distillation coil in a video here!
Hookah Bowls
- Heater Setting: Pinpoint
- Difficulty Setting: Hard - Very Hard
- Quality Range: 6k - 8k
Wine Glasses
- Heater Setting: Pinpoint
- Difficulty Setting: Moderate - Very Hard
- Quality Range: 8-9k+
