The Wiki for Tale 6 is in read-only mode and is available for archival and reference purposes only. Please visit the current Tale 11 Wiki in the meantime.
If you have any issues with this Wiki, please post in #wiki-editing on Discord or contact Brad in-game.
Difference between revisions of "User:Koinif/Carpblades Dae's Way"
m |
|||
| Line 20: | Line 20: | ||
===Part 2, Create a dimple=== | ===Part 2, Create a dimple=== | ||
[[image:Koinif_cb4.png]]<br> | [[image:Koinif_cb4.png]]<br> | ||
| − | This is probably the most difficult strike, again with a <b>Ball Peen</b> use the white lines to see how I try to position this strike, it is 1/2 way deep, but toward the center of the blade (about 1/2 way up the slope to the surface level of the middle of the blade). | + | This is probably the most difficult strike, again with a <b>Ball Peen</b> use the white lines to see how I try to position this strike, it is 1/2 way deep, but toward the center of the blade (about 1/2 way up the slope to the surface level of the middle of the blade). Blue circles indicate the lift after the strike has been made. |
| + | |||
===Part 3, Finish=== | ===Part 3, Finish=== | ||
[[image:Koinif_cb5.png]]<br> | [[image:Koinif_cb5.png]]<br> | ||
This strike may be best hit viewing the carp blade from the face, as the Base Tab will be flared up from the previous strike. Use <b>(g)</b> to gauge the right location. | This strike may be best hit viewing the carp blade from the face, as the Base Tab will be flared up from the previous strike. Use <b>(g)</b> to gauge the right location. | ||
Revision as of 13:56, 21 July 2012
Dae's Way
Having a good spouse should not be underestimated, and I would like to give credit where credit is due. Daenerys helped me understand a simple method to get a 6k+ carp blade in 13 hits. Now, when I actually make a carp blade, I add about 10 extra strikes to bring it up to 7k+, but the purpose of this is to help a few new players with the basic carpentry blade model. Please note: all strikes are Force: 9
Legend:
- White lines are designed to show how I break down the base model, not necessarily the strike point.
- Red arrows represent the strike point, at the tip, and in most cases, the strike has already been shown, so you'll need to imagine where the impact would be ... before being hit. In most cases on the carpentry blade, it is right on the edge.
- Yellow hashes are reminders of multiple strikes.
Forming the blade face
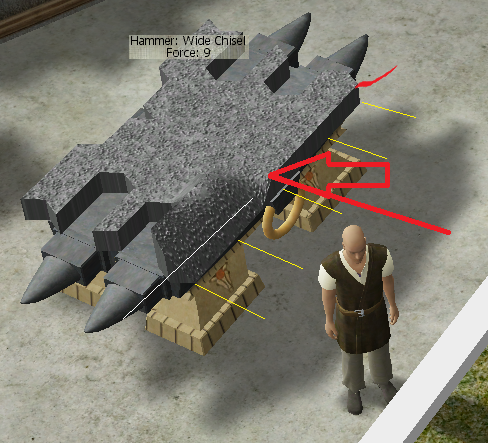
Five strikes, using the Wide Chisel starting on the edge & continue at the top where the angle becomes flat. Be sure your strike is as close to the edge as possible.
Mid Tabs
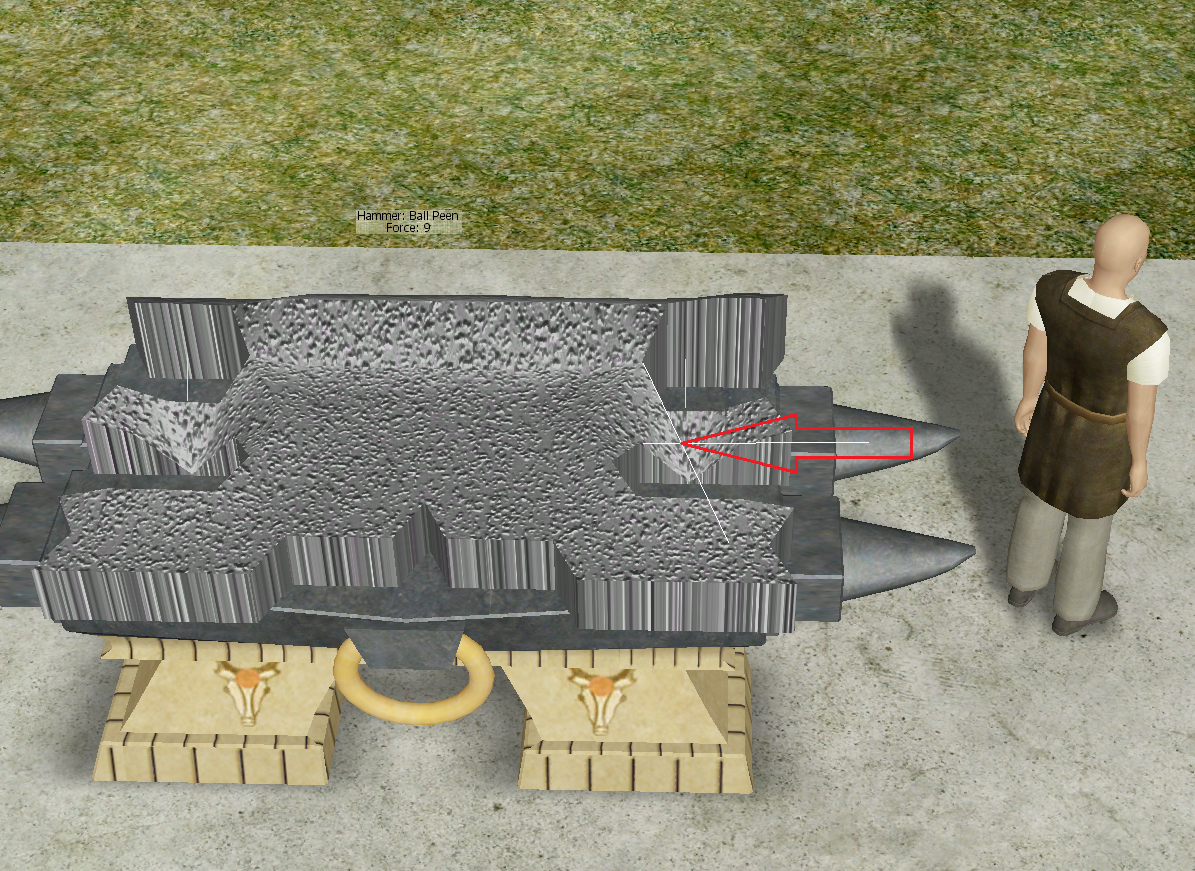
One single strike, full force with the Ball Peen on each side. I follow the angled edge to the far side (see white line).
Base Tabs
Part 1, Dividing the Tab
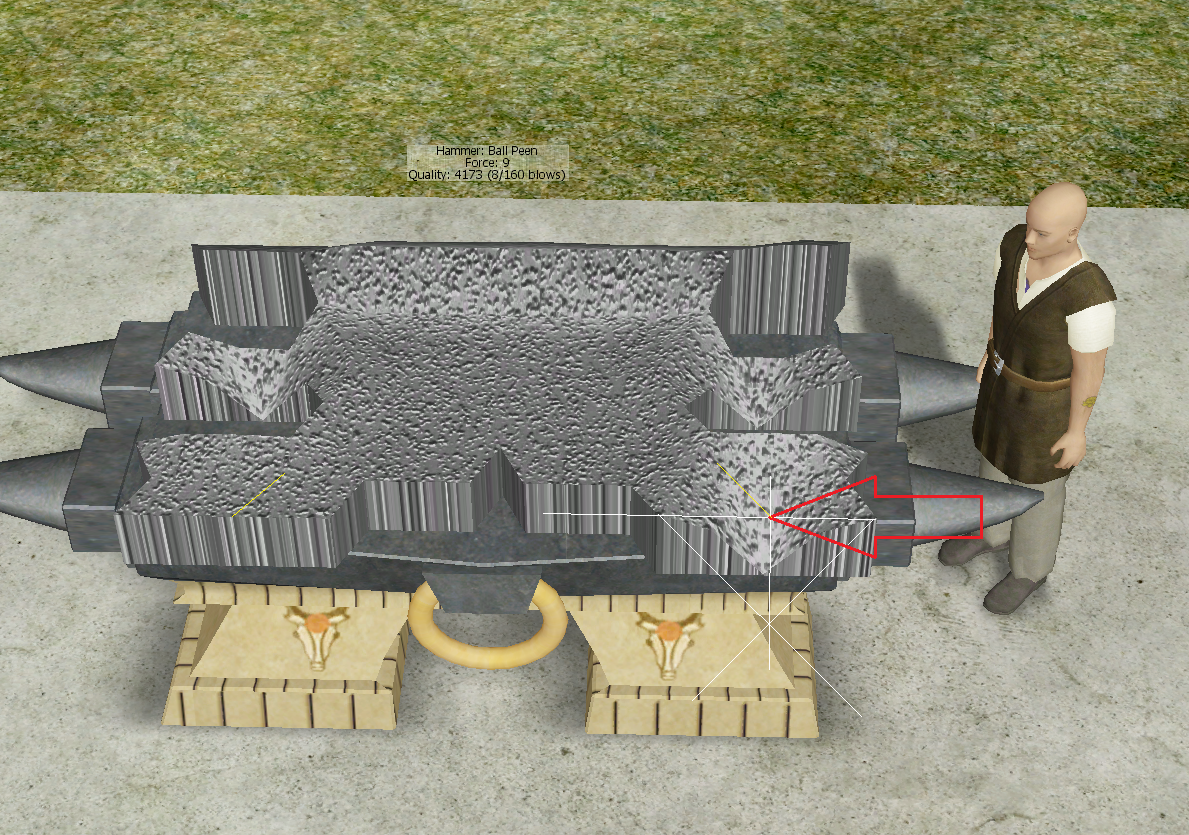
Just split the rectangle in half. Use Ball Peen as close to the edge as possible. Mid way along the base tab.
Part 2, Create a dimple
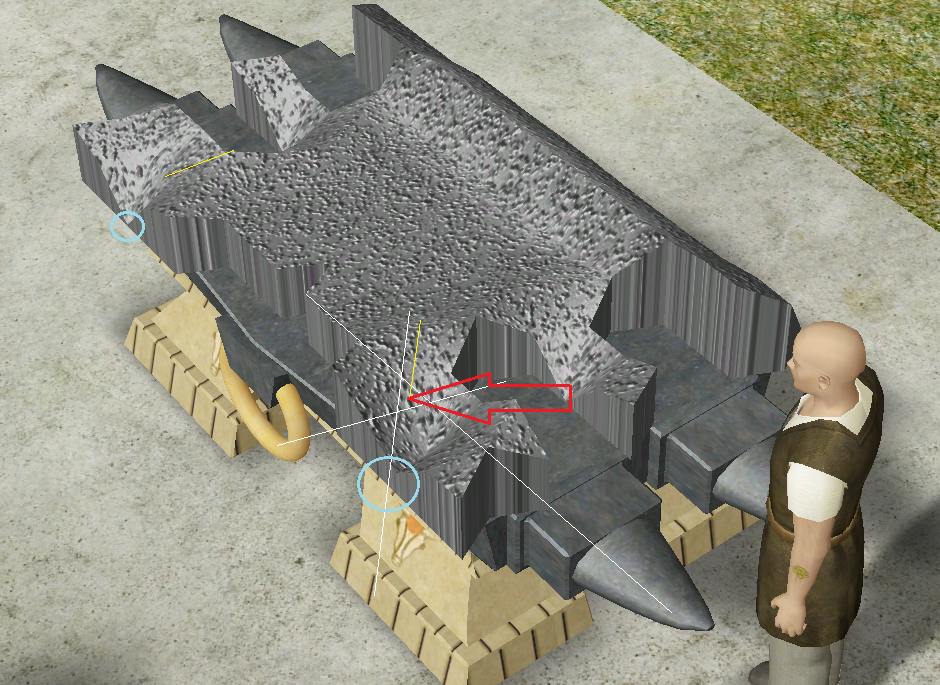
This is probably the most difficult strike, again with a Ball Peen use the white lines to see how I try to position this strike, it is 1/2 way deep, but toward the center of the blade (about 1/2 way up the slope to the surface level of the middle of the blade). Blue circles indicate the lift after the strike has been made.
Part 3, Finish
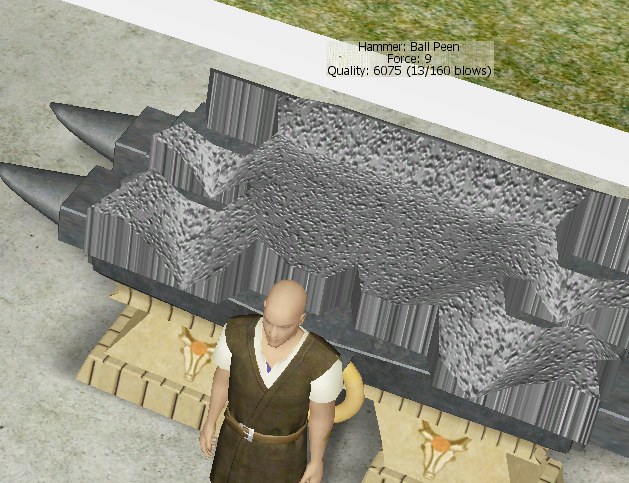
This strike may be best hit viewing the carp blade from the face, as the Base Tab will be flared up from the previous strike. Use (g) to gauge the right location.