The Wiki for Tale 7 is in read-only mode and is available for archival and reference purposes only. Please visit the current Tale 11 Wiki in the meantime.
If you have any issues with this Wiki, please post in #wiki-editing on Discord or contact Brad in-game.
Difference between revisions of "Shovel"
| (22 intermediate revisions by 2 users not shown) | |||
| Line 1: | Line 1: | ||
{{Languages}} | {{Languages}} | ||
| − | |||
| − | |||
| − | {{Template:ItemInfo|weight=1|bulk=1|image= | + | {{Template:ItemInfo|weight=1|bulk=1|image=shovel.png|description=A low quality shovel.}} |
| − | A shovel is | + | A '''Shovel''' is a reliable '''blacksmithed''' metal shovel. It is superior to the [[Slate Shovel]] and [[Iron Shovel]]. It does not break and improves digging efficiency based on the quality. |
| − | + | See [[Shovels]] for all varieties of shovels. | |
| − | |||
| − | |||
| − | + | ==Source== | |
| + | Produced at a [[Anvil]] and requires [[Blacksmithing]] and [[Advanced Blacksmithing]] | ||
| − | == | + | ==Cost== |
| + | *10 [[requires::Metal]] | ||
| − | + | == Uses == | |
| − | + | It is used in group [[digs]] to dig for stones, and can also be used to gather [[dirt]] from the ground. Both uses require dirt terrain. | |
| − | |||
| − | |||
| + | ==Research and Tuition== | ||
| + | *''40 Shovels (25 8500+ quality, 10 9000+ quality, 5 9500+ quality) needed for [[Advanced Blacksmithing 2]] research'' | ||
| + | *''100 Shovels (9500+ quality) needed for [[Storage Improvements 2]] research'' | ||
| + | |||
| + | ==Blacksmithing a Shovel== | ||
| + | The last shovel guide was from T4 and it was just a few lines. Here's the main points: | ||
| + | * Put your metal on your anvil. | ||
| + | * Your goal is to get a lower dent in the middle, get metal to the back sides and make a flat tongue at the front. | ||
| + | *Use a Shaping Mallet and try moving the metal from the area which will be the tongue in the end to the middle/back of the piece and then push it to the sides so it ends up with the height you need there. | ||
| + | *Try using force medium (7) to low (3) to get that done and shift a lot between the model and your work piece. | ||
| + | *Start at the front part where the tongue will be and try to push metal to the back. | ||
| + | *Hit in the front, but not the edge because you want the metal. This creates a higher ridge a bit behind the front. | ||
| + | *Push that back with 2 side strokes / a middle stroke if neccesary and repeat. | ||
| + | |||
| + | ==See Also== | ||
| + | [[Blacksmithing Guide]] | ||
| + | [[Shovels]] | ||
| + | |||
{{RequiredBy}} | {{RequiredBy}} | ||
| − | |||
| − | |||
{{ProducedBy}} | {{ProducedBy}} | ||
[[Category:Tools]] | [[Category:Tools]] | ||
| + | [[Category:Resources]] | ||
Latest revision as of 14:15, 4 April 2016
| English | Deutsch | français | magyar | Türkçe |
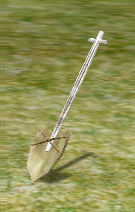
A Shovel is a reliable blacksmithed metal shovel. It is superior to the Slate Shovel and Iron Shovel. It does not break and improves digging efficiency based on the quality.
See Shovels for all varieties of shovels.
Source
Produced at a Anvil and requires Blacksmithing and Advanced Blacksmithing
Cost
- 10 Metal
Uses
It is used in group digs to dig for stones, and can also be used to gather dirt from the ground. Both uses require dirt terrain.
Research and Tuition
- 40 Shovels (25 8500+ quality, 10 9000+ quality, 5 9500+ quality) needed for Advanced Blacksmithing 2 research
- 100 Shovels (9500+ quality) needed for Storage Improvements 2 research
Blacksmithing a Shovel
The last shovel guide was from T4 and it was just a few lines. Here's the main points:
- Put your metal on your anvil.
- Your goal is to get a lower dent in the middle, get metal to the back sides and make a flat tongue at the front.
- Use a Shaping Mallet and try moving the metal from the area which will be the tongue in the end to the middle/back of the piece and then push it to the sides so it ends up with the height you need there.
- Try using force medium (7) to low (3) to get that done and shift a lot between the model and your work piece.
- Start at the front part where the tongue will be and try to push metal to the back.
- Hit in the front, but not the edge because you want the metal. This creates a higher ridge a bit behind the front.
- Push that back with 2 side strokes / a middle stroke if neccesary and repeat.
See Also
Required By
Advanced Blacksmithing 2, Dig, Dirt, Storage Improvements 2
