The Wiki for Tale 6 is in read-only mode and is available for archival and reference purposes only. Please visit the current Tale 11 Wiki in the meantime.
If you have any issues with this Wiki, please post in #wiki-editing on Discord or contact Brad in-game.
Guides/Test of Flight
There is a public glider port you can use in CCR right near the CS at -328, 6687. This tutorial is based on that glider port.
*** Do not use the Push Launcher menu!!! That will screw up this tutorial for everyone. ***
Start by clicking on the launcher and pinning its menu somewhere out of the way. You will have several menus pinned while you work on your gliders. I usually put them along the bottom of my screen.
Click the Start a New Design menu item.
Pin the Launch Sequence menu (not the Launch the Glider Sequence item). Pin the Glider 1 and Glider 2 menus. Pin the Tweak the Gliders menu and the Edit Control Pylons menu.
For the purposes of this tutorial start by setting glider one’s Launch Angle to 140. On the Tweak the Gliders menu set the Lightness to 100. The launch angle determines the glider’s initial direction. 0 is north and the angles proceed clockwise around to 359. The lightness determines the lightness of the smoke. 100 is white and 0 is black. We’ll start out with white, but change the color later.
Once you have all your menus pinned you are ready to start working on your gliders. The way a glider works is that it flies at a set altitude above the ground in a straight line. When the ground changes shape the glider reacts according to a number of parameters you set. Go ahead and click Launch on glider one’s menu and what how it behaves. When the ground slopes the glider flies at a bit of an angle and turns downhill. How much it turns can be controlled by the Tendency to Turn when Flying Tilted parameter.
When the ground falls the glider falls and when it rises the glider rises. However, it doesn't track the shape of the ground perfectly. When the ground rises sharply the glider pulls up so hard that it goes into a loop. Further along its path it has to pull up sharply again, but this time it isn’t hard enough to loop. Notice that it ends up at a much higher altitude and takes a little while to get back to its cruising altitude. You could change the shape of those curves by changing the Tendency to Dive to Cruising Altitude, Tendency to Pull up to Avoid Obstacles, and Tendency to Track Shape of Ground parameters.
Set the Tendency to Pull up to Avoid Obstacles parameter to 100 and launch glider one again. This setting is useful if you are crashing into water or into sudden obstacles. It can also be useful if you want the gliders to pull up suddenly. You can also lower it to cause more close calls which can result in an interesting flight. When I see that there are a bunch of bodies of water around I usually start with a value of 100 and tweak it as I figure out where I’m going to fly my gliders.
Set the Tendency to Turn when Flying Tilted parameter to 100 and launch glider one again. Now that it is turning more the flight path is more dynamic, but it’s still pretty boring. Set the Tendency to Track Shape of Ground parameter to 0 and launch glider 1 again. Notice that it does more loops? That's because when it pulls up to avoid bumps it is less concerned about tracking the shape of the ground and doesn’t flight back down right away.
Set the Tendency to Roll when Upside Down parameter to 100 and launch glider one again. That makes for an interesting flight, but it does a death spiral at the end and crashes. I never vote a glider port monumental if one or more of its gliders crashes. It just doesn’t seem right to me. So, I try to keep my gliders alive until they fly off into the sunset. You could sit here and play with the various parameters until you got an interesting flight that survived, but parameters are not fixed entities. You can also tweak them during the flight.
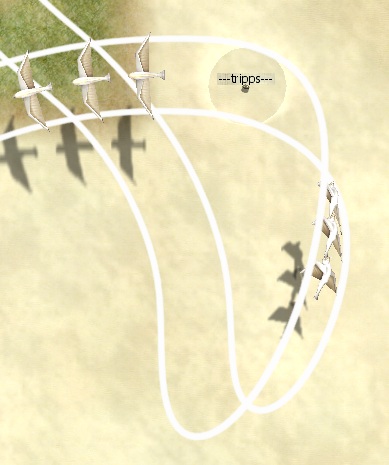
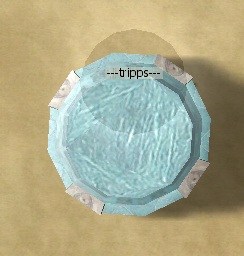
Tweaking a parameter during a flight is done with a control pylon. Run over to -300, 6692. Launch glider one over and over again in bursts about 15-30 seconds apart. This will give you a long chain of gliders all following the same path and will allow you to see the results of the control pylon changes right away. Switch into the F8-F8 view so you are looking down from above. Once the first glider in the chain gets to you tweak your position so that it looks like the following image and click New Pylon. (The white circle in the image is the control pylon viewed from above.) Once the pylon is in place you can return to the F7 view.
The trick with control pylons is that they are very position sensitive. If you aren’t in the exact position I am in, your results will be different from mine. Try to get as close as possible, and just realize that your results are going to be different from mine.
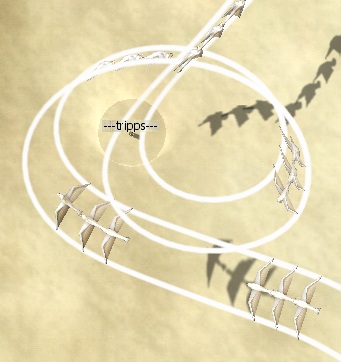
Once the control pylon is in place, check the Tendency to Track Shape of Ground item and set the value to 6. If you are exactly where I was you’ll notice that the gliders now fly on quite a bit longer with many more loops. If you aren’t exactly where I was you’ll have different results. Go ahead and play with the values until you get a flight you like. You can add more of these pylons to continue to alter the flight. You are allowed up to 15 pylons. Each pylon can change one value. You use the same dialog to modify all the pylons and any changes you make to it will change the pylon closest to where you are standing. You’ll notice that sometimes very small changes to parameters or the location of the pylon can have very large effects on your flight path. Other times drastic changes can have little effect. It all depends on your flight path, the shape of the ground, the location of the pylon, and the parameter you are changing. Feel free to play with these parameters with pylons in different locations to get a feel for them.
Before moving on to the next glider, let’s set the smoke color. Change the Smoke Hue to 65 and the Smoke Lightness to 35 and launch glider one again. You’ll notice that it now has a dark blue smoke trail. The Smoke Hue parameter determines the color. You’ll need to play around with it. Starting at 0 it is red, orange, yellow, green, cyan, blue, purple, pink, and finally red again at 100.
Once you are done with glider one, let’s set up a second one. Set its launch angle to 11 degrees and its launch time to 5 seconds and launch glider two. It’s an interesting flight, but it crashes and it is the same color as glider one. You can change the color by creating a new control pylon close to where glider two leaves the glider port and using it to change the Hue to 100. Now glider one will be dark blue and glider two will be dark red.
Glider two still crashes at the end of its flight though. You can change that by running out to -313, 6662 and adding a new control pylon. I found that tweaking the glider’s tendency to track the shape of the ground to 30 gave it an interesting flight path. Once again though, you’ll probably see a different flight path than I did since your control pylon won’t be in the exact same spot as mine.
Finally, once you have the flight paths you want, see how they look together. When you are designing a real glider you should consider this much earlier in the process, but now is fine for this tutorial. Click the Launch the Glider Sequence. This will launch glider one, wait five seconds, and then launch glider two. You can change the timing with the Set Launch Time values on the gliders. Gliders must be separated by at least 0.2 seconds and all gliders must launch within the first 30 seconds. If you set a launch time greater than 30 seconds it will take the value without error, but that glider will never launch.
Gliders will live until they hit the ground, hit water, or disappear from view. Remember that as you move around your horizon travels with you. A glider that may be visible to you while you are over near a control pylon may not be visible to someone standing at the glider port or vice versa. It is always a good idea to watch the entire sequence from next to the glider port at least once after your last tweak to confirm that it is behaving the way you expect.
If you click the Set Launch Time item while far from the launcher nothing will happen. Then when you try to change another setting you'll get a message that the glider port is busy. If you then walk over near the glider port the Set Launch Time dialog will appear. Closing that dialog will return the glider port to normal operation.
Have fun and play with the glider port. Try many different launch angles and parameters. Try putting pylons in various locations and changing various parameters. Feel free to /chat tripps any time you have any questions.


