The Wiki for Tale 5 is in read-only mode and is available for archival and reference purposes only. Please visit the current Tale 11 Wiki in the meantime.
If you have any issues with this Wiki, please post in #wiki-editing on Discord or contact Brad in-game.
Difference between revisions of "User:Sunstrider/Smithing Guide"
Sunstrider (talk | contribs) |
Sunstrider (talk | contribs) |
||
| Line 20: | Line 20: | ||
== The tools == | == The tools == | ||
| − | + | The experience with the tools is important in forging, especially the required strength for correct blows. It may take some time, but at some point you'll know which force you should to use. <br> | |
<br> | <br> | ||
The following are the beating pattern of the individual tools, and a brief explanation. <br> | The following are the beating pattern of the individual tools, and a brief explanation. <br> | ||
Revision as of 17:08, 2 April 2011
Feel free to translate it into english here
Used Google translate for this - BlueGrass
General Information
Ok my first guide itself: I will not start from here ZERO, then at least the basics very rough even know you ... For example, that better parent metal increases the number of beats or what is the goal at all or how to achieve it (by 'simple' move the metal)
Here first some 'advanced' foundations follow for forging. That with the pattern we have very quickly out to deal with the tools may well need it, but of understanding and practice. The understanding of the tools builds much on the child model.
The pattern
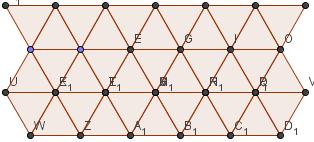
No matter what you want to forge, it is always a pattern of equilateral triangles as that used when the image in as (Ignore the point labels ... they have unfortunately not able to hide, or it would take forever: P). It's about the individual points at the right height to bring the lines then fit automatically.
Now if you forge or click on the blank as you have a tool selected, the next point as the center is chosen for your tool. This reduces the amount of some points and for the other increases.
The tools
The experience with the tools is important in forging, especially the required strength for correct blows. It may take some time, but at some point you'll know which force you should to use.
The following are the beating pattern of the individual tools, and a brief explanation.
Here, the tools are here arranged in order of importance (in my opinion anyway):
Shaping Mallet
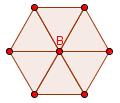
Shaping Mallet said the seven points that he directly influenced. The middle point in this case, the point B.
For Shaping Mallet is to say that it is smooth. Thus, it will first hit the high points: If you click on a low point, which is surrounded by higher, are only brought the higher the level of the clicked point before you made an effect on the point itself.
The Shaping Mallet moved the metal by up to 4 points away from the starting point and so he moved the metal the most, making the best use for the rough work to 8k or so very good (of course one has to distinguish from situation to situation .. . If the metal is used in the area, it is more practical to use a different tool).
Ball Peen Hammer

The Ball Peen Hammer has in itself the same pattern as the Shaping Mallet (center B), but the outer 6 points are much higher up, which is usually targeted only the actual point taken.
The fact that with the tool almost always hits the target point actually, this tool is very good for the fine work and the 'finishing touch'. ;)
The small ball-peen hammer moves the metal by up to 3 away from the starting point for something completely different.
Wide Tungsten Chisel

Thus, the tungsten chisel now has a completely different pattern! The center is the point E, the tool runs to the middle (horizontal view) pointed to.
From its shape it can be concluded what this tool is good: for the blades to be ... But since it is not possible to rotate the bit to be use is restricted to very strong ... I use it for axes and frames blades.
He moved the metal by up to 3 points away from the starting point, but only forward or backwards!
Round Hammer

The round hammer has exactly the same pattern as the hammer and is also flat!
The only difference is how far he moved the metal.
This tool moves the metal up to 3 points away from the starting point. He also seems to me to 'weaker' than the flail, which is probably due to the distance he moved the metal. I personally use it regularly for hatchets.
Hatchet
Well, what are good Hatchet should be clear - you get more wood in the collection of trees, but also simultaneously increases the time until we can again collect wood from these trees
.
counts:
- 7000 Quality is always the double of wood (and doubles the recovery time)
- 9000 Quality is three times higher than for wood (and tripled the recovery time)
- 9650 Quality is always four times on wood (and quadruples the regeneration time)
- 9999 quality is almost a factor of five to wood (and quintuple recovery time)
I'm not sure at all levels;)
Pattern
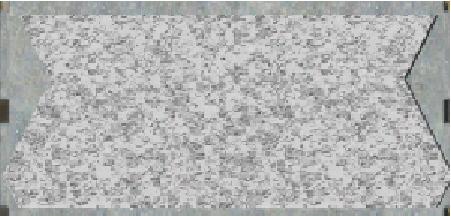
Here again the normal image.
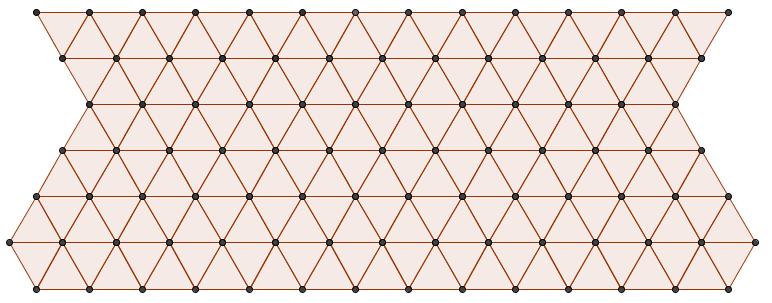
Now, as a triangle pattern!
Start
So we naturally begin with the shaping mallet. For the first two pictures, the colors are as follows:
- Green: thickness 6
- Pink: Force 7
- Blue: Strength 8
- Red: Strength 9
The numbering is of course the order;)
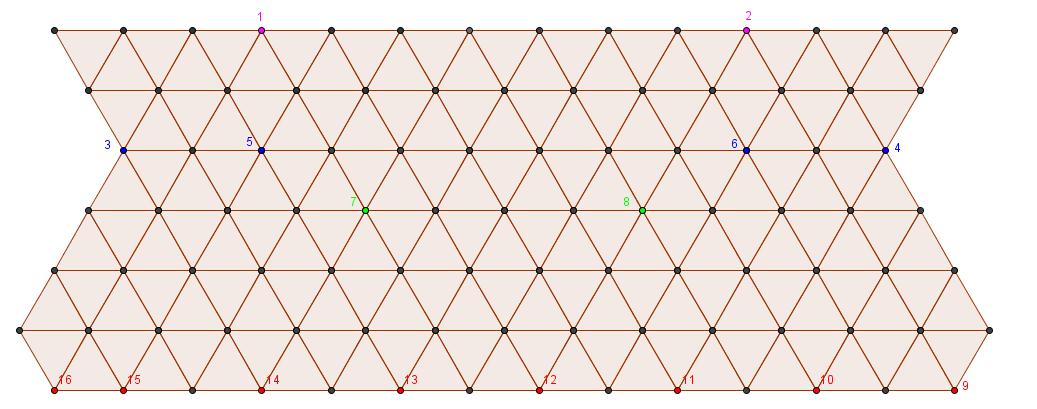
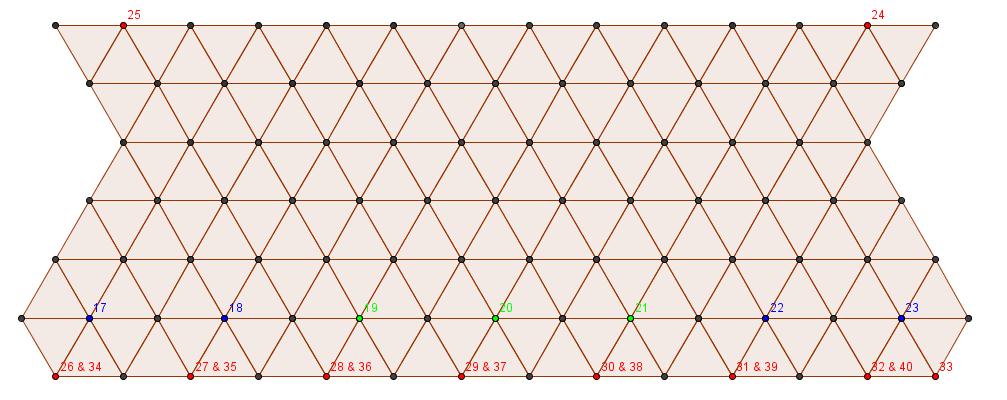
Colors are on the next image is still with the addition:
- Light blue: level 5
It remains with the Shaping Mallet, except shock 48 and 49 with the round hammer (one of them with power 5 and only if it still should be a high afterwards)!
From here I always vary somewhat, since the metal is not always move in the same direction ...
In most cases, however, ended this way:
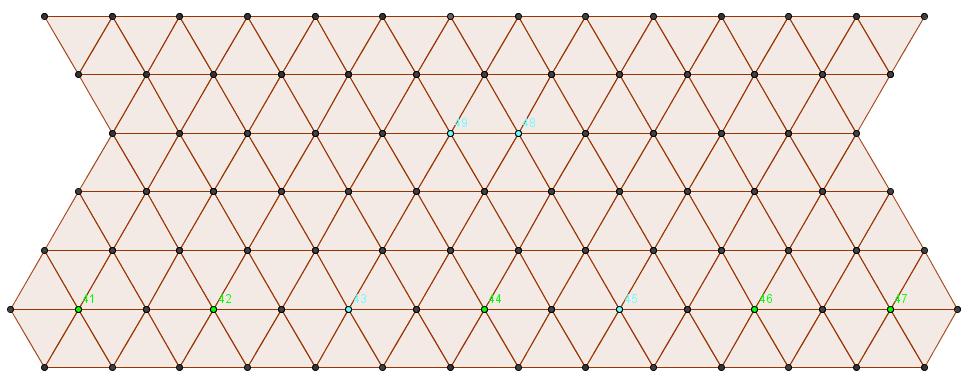
So now it is difficult to show the rest, because you simply must vary from now ... For the time being I use the back of the hammer round the pitch at the corners get added.
Then again I improve the pitch of the blade, I'm now a little over 8k + quality.
Then the blade is at the front using the tungsten chisel (mostly level 3) is pressed down so that they actually tapers (as seen in the target). Now I'm usually over 9000 quality and the rest is just fine-work mainly with the small ball-peen hammer.
So that's all I can say this, hope it helps further.